Getting started
Last updated:
This guide takes you from signing up to seeing your chatbot answer on your website. It usually takes a few minutes, plus the time to gather the content your chatbot should know.
Create your account
- Go to the sign-up page (or click Sign up in the site header).
- Enter your work email and accept the terms of service and the privacy policy.
- Leave Start my 14-day free trial — no card needed checked if you want to start with the trial.
- Complete the CAPTCHA and click Create account.
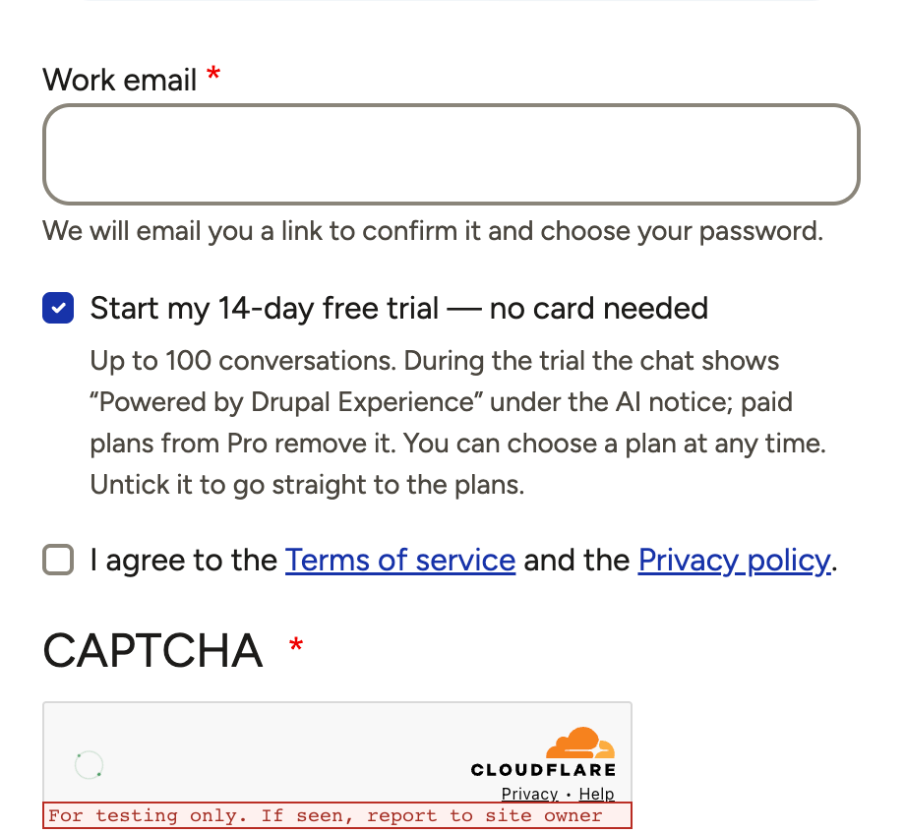
You do not choose a password yet, on purpose: only the person who can read the mailbox sets it.
Confirm your email and set your password
- Check your inbox. You receive a link to confirm your address. It is valid for 24 hours and works once.
- Open the link, choose your password (at least 10 characters, and it cannot contain your email) and click Activate my account.
- On Tell us about your company, enter your company name, country and, optionally, your website.
- Your trial starts and you land in your panel.
If the email does not arrive, check your spam folder, or sign up again with the same email to get a new link (up to 3 emails per address per hour). Disposable email addresses are not accepted.
The free trial, or going straight to a plan
The trial lasts 14 days or 100 conversations, whichever comes first, and needs no credit card. It has smaller limits than the paid plans, and the widget shows "Powered by" under the AI notice.
If you untick the trial box when you sign up, you go straight to the plans after signing up. You can still start the trial later from the plans page with Start my free trial, once, as long as you never had a plan.
When the trial ends, the chatbot stops appearing on your website, but you can still log in: your chatbots, knowledge and settings are kept, and choosing a plan turns the chatbot back on. More in Plans, trial and payments.
Create your first chatbot
Your panel home shows a Get started checklist: Create your chatbot → Add what it should know → Install it on your site. Each step completes on its own.
- Click Create your chatbot (or open the Chatbots tab and click Add chatbot).
- On the General tab, enter a title, the Domains of your website (for example example.com), the Default language and the Multilingual policy.
- Optionally adjust Appearance, Texts per language and Live chat.
- Save.
www. is included automatically with your domain; subdomains are not, so add each one or use *.example.com. Details in Set up a chatbot.
Add what it should know
- Open the Knowledge sources tab and click Add knowledge source.
- Give it a title and choose a type: Text, Questions and answers or Files.
- Set the Content language, check your chatbot under Chatbots and add the content.
- Save. When the source shows Up to date, usually a few seconds later, the chatbot can answer from it.
Load only what you would publish on your website: anything in a knowledge source can be shown to any visitor. See Knowledge sources.
Install it and check it shows
- Open your chatbot from the Chatbots tab and copy the Installation script with the Copy button.
- Paste it on your website before the closing
</body>tag, on every page where the chatbot should appear. The easiest place is your site's global template or footer, or the "custom code / scripts" setting of your CMS or tag manager. - Publish and clear your site's cache if it has one.
- Open a page of your site in a new browser window. After about 3 seconds the avatar appears in the corner you chose. Click it and ask a question about your content.
In your panel, the chatbot changes from Not installed yet to On your site once the widget has loaded on your domain.
Need more help?
Once you are signed in, the support assistant on every page of your panel answers right away, and Help for clients has a guide for each part of the panel. Before signing up, contact us or start your free trial.